
Halloween is a week from today!! Do you have your costume ready??
And without further ado....I bring you, The Baby Witch Hat...
I want to thank Jenny for giving me the chance to do a guest post. Sharing my DIY’s with others is something I’ve wanted to do for a long time, and I appreciate her giving me the chance to get my feet wet.
When my son turned 3 in September, he requested party hats and I knew I wanted to make something for my daughter, Milly, as well. After sizing down the pattern I made for the bigger hats, I came up with this.

With Halloween fast approaching, and no luck finding a great costume for a baby under six months, I began contemplating what I could whip together. Halloween has always been my favorite, and growing up I was fascinated with witches, playing the part of one myself several times. I figured modifying the party hat pattern would be a simple solution!
Here is what you will need:

the essentials:
felt
witch's hat PDF


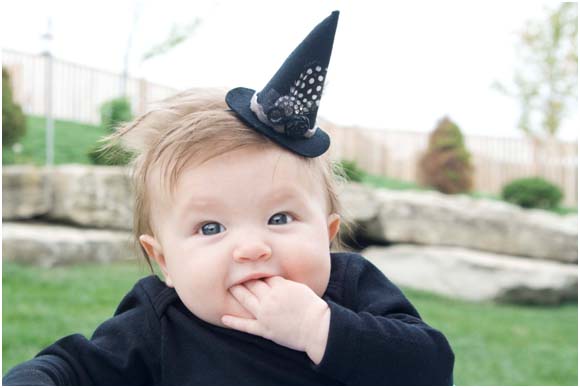
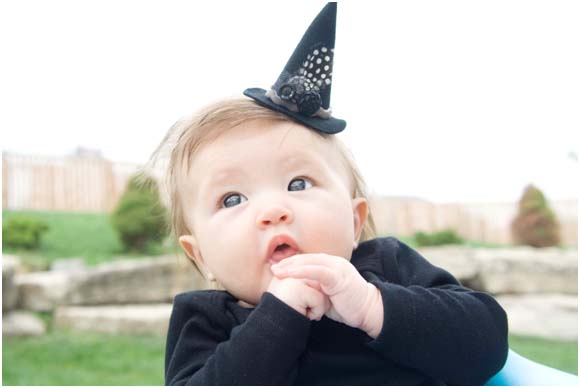
Isn't that just the cutest lil smile you've ever seen! She definitely looks like a good witch to me :)
Thanks so much Gwen for sharing your creative talent with us!
Happy Wednesday everyone,
Jenny
a writing utensil (chalk works will for black felt)
1/16” elastic cord
hot glue or fabric glue
the possible pretties:
buttons
ribbon
rick rack
feathers
beads
tulle
bows
a little spider moss would be fun
whatever your heart desires!
Print and cut out the pattern templates. Using a cardstock or thicker paper will make them easier to work with.
Trace them onto the felt and cut out the shapes.


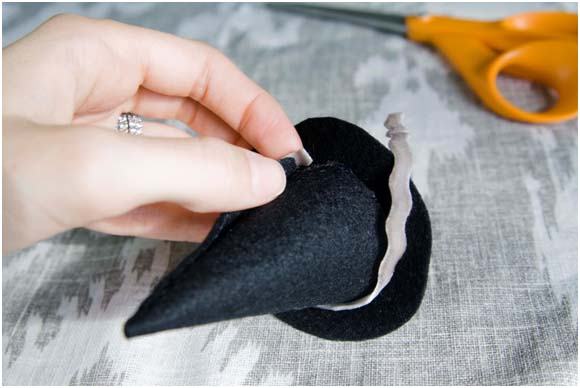
Shape the top of the hat like it’s a waffle cone. You should have an overlap of about ½” at the
base.

Glue the hat together, leaving the end unglued so you have
some room to tuck your trim under.

Glue the top of the hat to the brim, making sure the hat is
centered. Don’t worry about any visible
glue, as you’ll be covering that seam up with ribbon.

Cut and glue ribbon around the seam, tucking the ends in at
vertical seam, and gluing that area down.
Now you’ll want to embellish your hat. I added some old buttons, a feather, and some
tulle that I colored with a sharpie.
With two little ones, a quick trip to the craft store isn’t an option, so
I made what I had work.


I did the same thing with the elastic. I know you can buy elastic in many colors,
but I’ve found that coloring it with a sharpie for various headbands has worked
well. If you’re worried about the strong
odor, I just rinsed it in some soapy water afterward and after a few days the
smell had dissipated. I simply placed
it around Milly’s head to see what length I needed.
Place a drop of glue on in the center of the bottom of the
hat and attach both ends of the elastic.

Cut a circle out, smaller than the brim of the hat, and glue
it over the elastic ends.


There you have it! A
cute little hat for your little one, or your big one, or maybe yourself as you
hand out treats on All Hallows’ Eve.


Thanks so much Gwen for sharing your creative talent with us!
Happy Wednesday everyone,
Jenny
What an adorable hat! Great tutorial.
ReplyDelete