Showing posts with label recipes. Show all posts

Monday, November 5, 2012

Chicken Tortilla Soup...hello fall!

yummy...


Phew! These past three weeks have been a whirl-wind! There has been costume making, birthday celebrating, trick-or-treating, Halloween parties and parades, baseball, soccer, open houses, school carnivals and more....makes me tired just thinking about it! I had been wanting to share pictures of Kate's Halloween costume. I made hers and my niece's from the same pattern and they turned out totally different and totally adorable! Kate was a pink poodle....we thought this was a good choice since one of her favorite phrases is "hi dog!". Julia was a sweet lil sheep...I will get pictures to share from her momma soon.
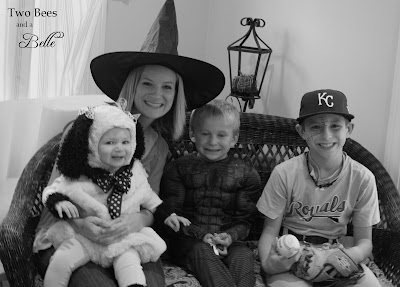
The witch, pink poodle, spiderman (minus the mask), and zombie baseball player
 
 And since it's a cold rainy day here in Missouri, I thought I would share one of my favorite fall soup recipes....


I made this soup for Bryce's Birthday party two weeks ago and it ended up being a great selection, because I threw it in the crock pot in the morning and it cooked all day, ready when the guests arrived!  Noooo prep...my kind of cookin!

You will need:
- 4 chicken breast halves (I use chicken tenders - they cook faster and I think are easier to cut!)
- 2 15 oz. cans of black beans, undrained
- 2 15 oz. cans of Rotel
-1 cup of salsa (mild, med. or hot)
4 oz can green chilies chopped and undrained
- 14 1/2 oz. can tomato sauce
- tortilla chips
- grated cheese
- sour cream (opt.)

First, combine all the ingredients (except the chips, cheese, and sour cream) in a large crock pot.
Next, cover and cook on Low 8 hours (or I have done 4 hours on high and it tastes great!).
Just before serving shread the chicken - because I really am just that lazy, I don't even remove it, I just kind of fish around and shread it in the pot, but I am sure a thorough person would remove it to do this :)
Ladle into individual bowls and top with crunched up chips, grated cheddar cheese, and I put a dollop of sour cream on top of mine....total comfort food!  Enjoy!

Jenny

Saturday, July 28, 2012

What's For Dinner Board

These past few weeks I have been an organizing nut around here.  Nothing has been left unturned, much to the boys dismay!  It feels so great to start the school year off organized!  For me if I can put my hands easily on things it just makes for a much happier mamma.  I was looking for a good little chart on Pinterest to organize meal planning weekly and I stumbled across this magnetic board that some very clever person had made!  Click here for original link and directions on my pin board.)  I thought this was the cutest idea!  So I pulled out my trusty Hobby Lobby coupon and set off to make my version.  The days of the week are magnets so that you can attach your recipes by day.  There is a little pocket to hold your standby recipes in, plus I added a few for fun...kid's choice, breakfast for dinner, Eat Out, etc.  There is a little post it pad attached to add grocery store items to as well.  In conjunction with my iPhone app called Cozi Family Planner, I am now quite dangerous when it comes to planning meals!  I have most of our standby recipes saved in my Cozi recipe box which, with the click of a button, I can add to a grocery list!  So cool!  So far, the boys seem to enjoy offering suggestions of what we have and when.
Now all I need to do is cook....hmmmmm.


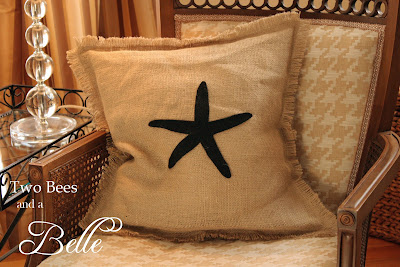
Don't forget to enter the contest for the free pillow giveaway!
This pillowcase is 20" x 20"  - 18" (insert not included) burlap and felt with envelope closure.
To enter just write me a little comment in the box below.  If you share this link on your Facebook page, enter a second comment below that says "shared you on FB" and you will be entered twice!
A winner will be selected Sunday evening - cutoff for entering 7 pm CST.

(don't have a Google account?  That's ok!  Just choose to comment Anonymously - but don't forget to leave your email in the comment box so I can contact you if you win!)

Good Luck!

Jenny

Friday, June 15, 2012

Strawberry Yummies and my Scone Recipe

Such yummie strawberry treats were enjoyed at Mary Kate's first birthday party!  We started with strawberry scones.  I picked this recipe up when we were on vacation in Destin, FL one summer.  I make it all the time and it is one of my family's favorites!  See below for the recipe.
I also found several great recipes on pinterest that I added to my Strawberry First Birthday Party board.  The Strawberry Tea is officially my new "drink of summer"!  The Jack bread sticks and Strawberry Salad with Balsamic Lime Dressing were soooo easy!  We added a little seasoned chicken breast on top of our salad and they were the main entree.  Of course I knew salad wasn't going to be a huge hit with the two B's, so macaroni was also in order!


For the cupcakes and Kate's "mini-cake" I used a recipe I discovered on the blog I mentioned yesterday called  This Inspired Me. The recipe is  called Strawberry Dream Frosting...all I need to say here folks is THREE CUPS OF BUTTER...oh yes...a dream.  We added some sparkly white sugar. 
 For the little cake, I used a jumbo muffin tin and filled just three of the cups (I put water in the unfilled ones so that the pan wouldn't burn).  When they came out of the oven I sliced the "muffin tops" off, leaving three little mini-cake layers...I assembled these as you normally would a layer cake and....Viola!  Mini Cake.


Fresh strawberries
3 cups of self-rising flour
¼ cup fruit
½ cup sugar
1 stick of butter
½ cup of buttermilk
*      Note:  I use more buttermilk than the recipe calls for…I don’t really measure it…sorry!  I just add a little bit at a time until the consistency is that of slightly sticky dough.
Prepare the fruit by slicing and sprinkling with a little sugar. Set aside.
Combine flour and sugar.  Cut butter into flour and sugar mixture until it resembles a course meal.  Add buttermilk * see note above, then fruit.
Stir until all ingredients are moistened and form a soft ball.  Turn out on a generously floured surface and knead until it can be patted out ½ inch think.  Cut with a biscuit cutter.  Bake in a preheated oven at 400 degrees for 10 to 12 minutes.
 Glaze:
Strawberries
1 cup powdered sugar
A few drops of milk or whipping cream
Puree a small amount of strawberries.  Stir in the powdered sugar and a few drops of milk to make a glaze.  Adjust liquid to make a consistency for brushing top of scones with a pastry brush (I just spoon it on).  Brush tops of scones and watch the glaze disappear…or if you’re like me you put a lot of glaze on and can still very much see it as you sneak two of these little delights before calling the job “done”… :).